Connect to QuickBooks Online in a Microsoft Flow Workflow Using a PowerApps Custom Connector
In this walkthrough, you learn how to connect to accounting data in QuickBooks Online (QBO) in a Microsoft Flow using a Custom Connector. This approach provides a way to build forms in Microsoft PowerApps that integrate with your accounting data stored in QBO for things like recording employees timesheets, creating invoices, etc. This walkthrough demonstrates how to update a SharePoint list item from a value in QBO. Specifically the Flow will look up the customer name based on the customer ID entered in to the SharePoint list item.
Prerequisites
- Intuit Developer Account
- Intuit QuickBooks Online app
- Add https://www.getpostman.com/oauth2/callback and https://msmanaged-na.consent.azure-apim.net/redirect to the list of Redirect URIs allowed for your app
- Postman
- Microsoft Office 365 Subscription
- A trial subscription works as long as it includes Microsoft PowerApps and Microsoft Flow
Create Postman Collection
One of the easier ways to create a PowerApps custom connector is by importing a Postman collection.
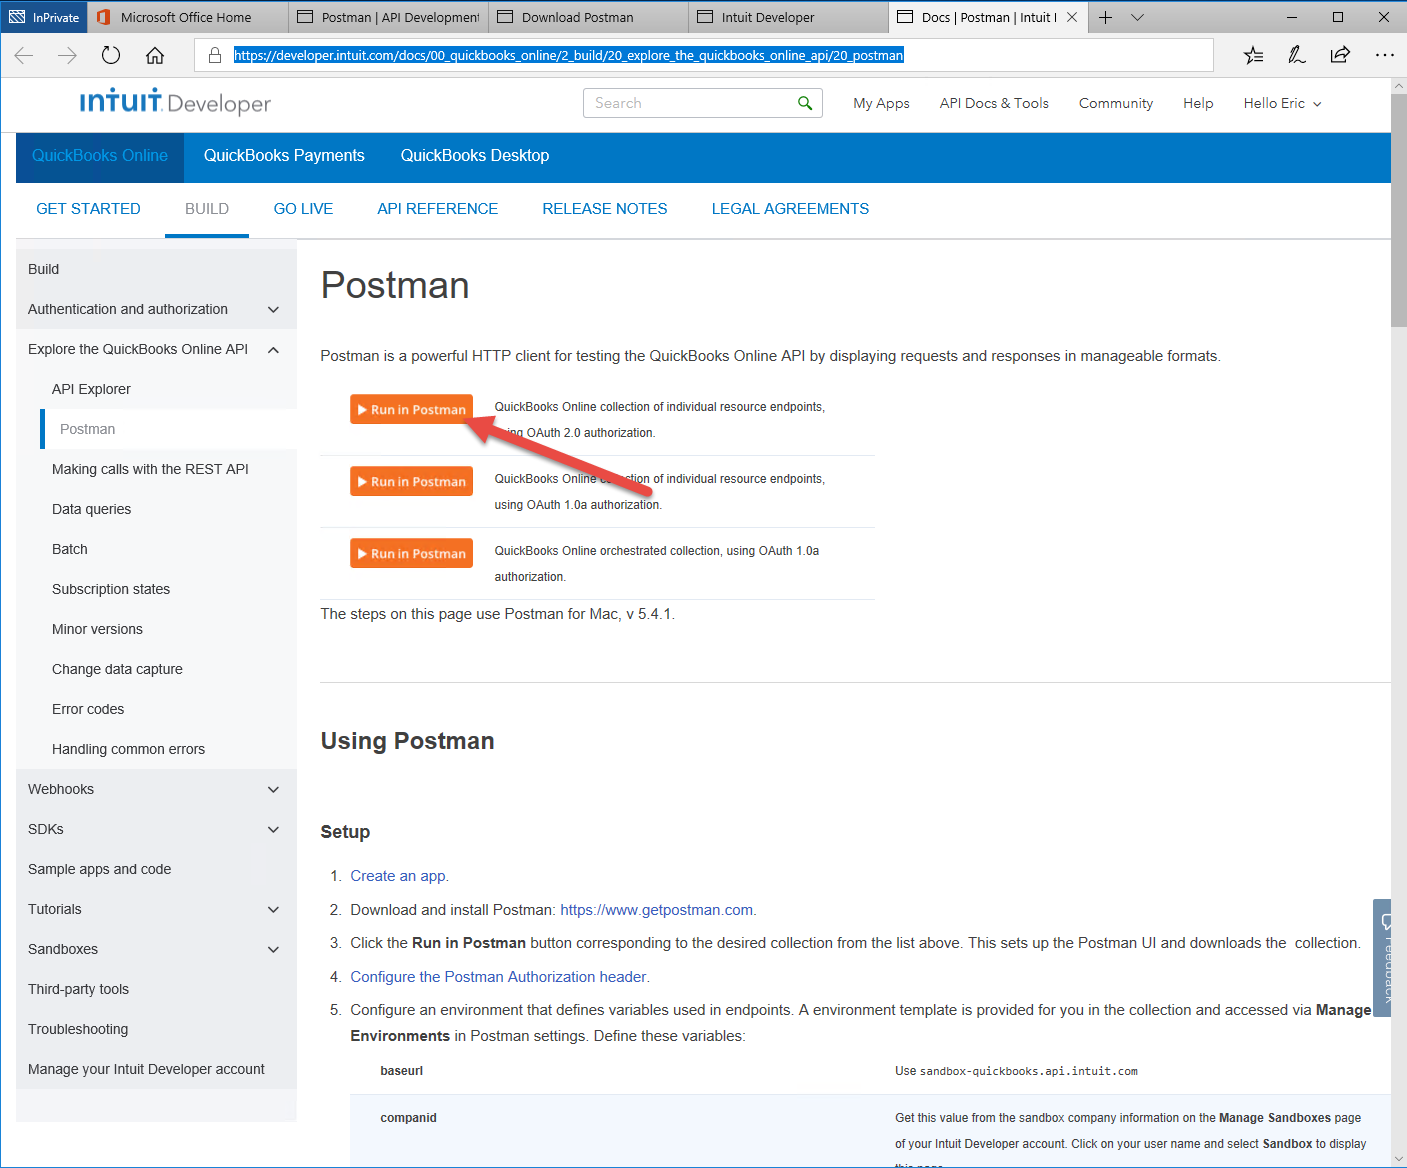
- Start by importing the Postman collection found on the Intuit Developer website in to Postman.
https://developer.intuit.com/docs/00_quickbooks_online/2_build/20_explore_the_quickbooks_online_api/20_postman
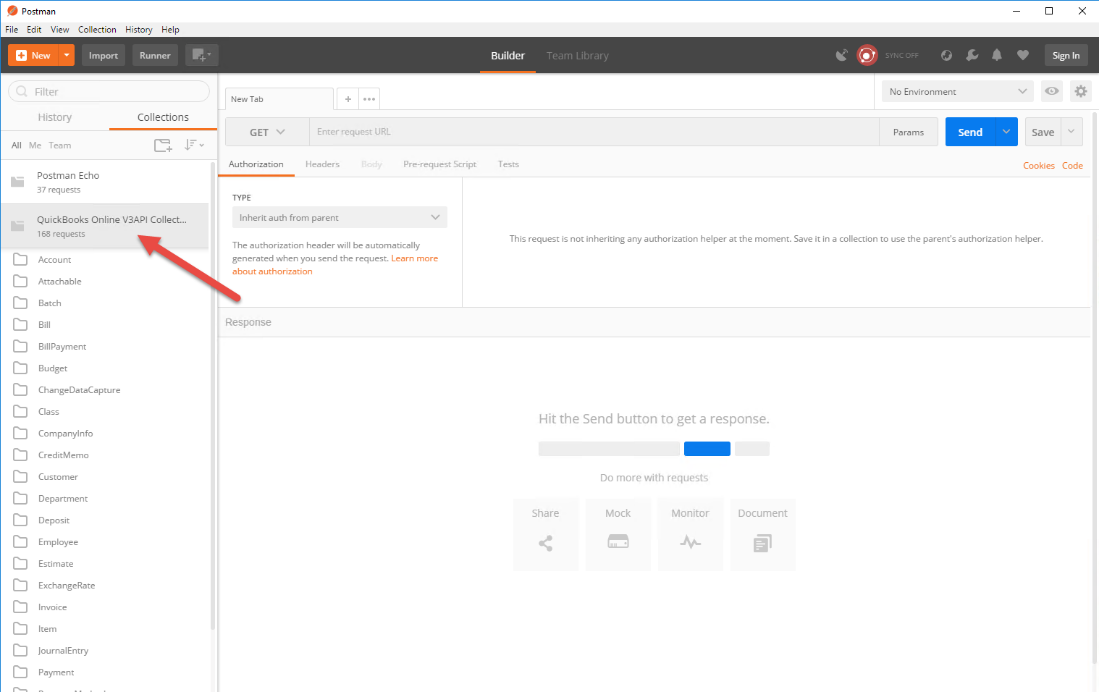
You could also start with a new collection in Postman if you prefer. - You should now see the imported collection in Postman
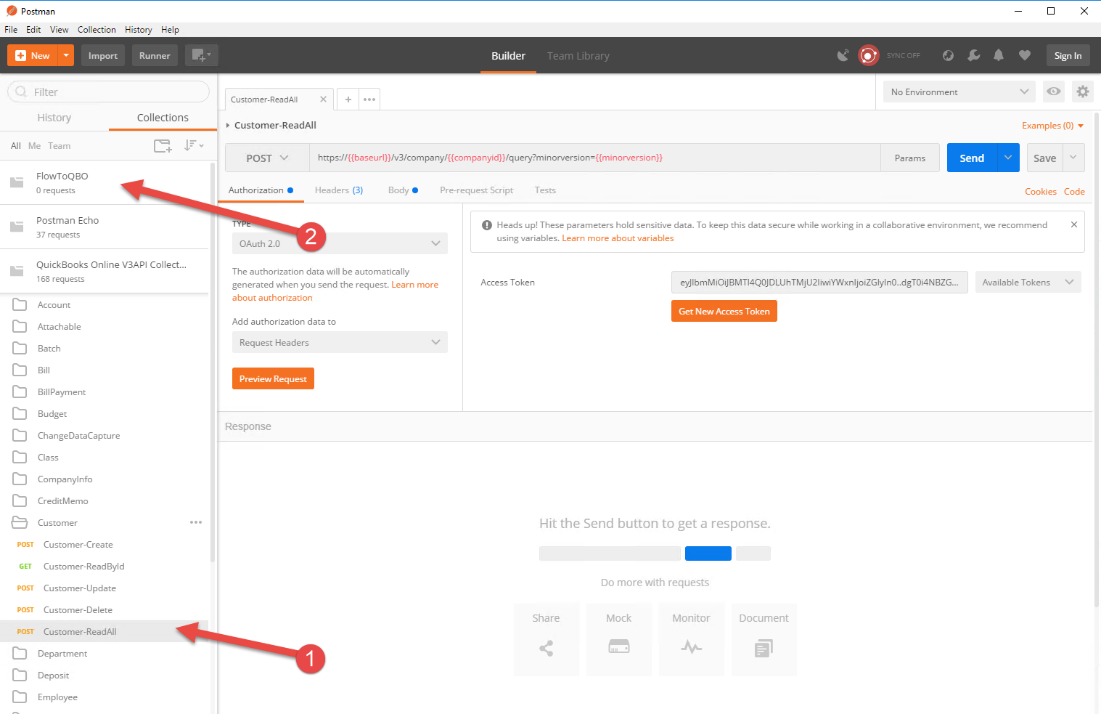
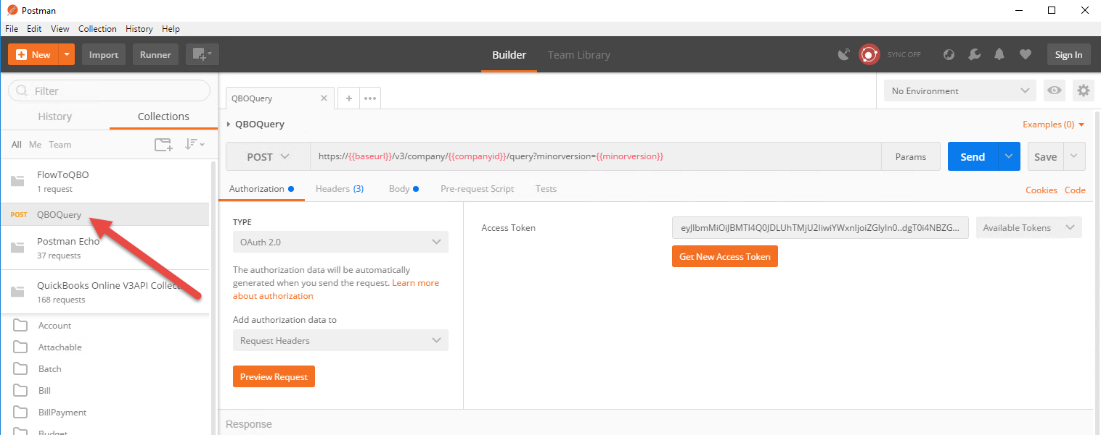
- Create a new collection and copy Customer-ReadAll (1) in to your new collection (2)
- Rename the request to QBOQuery and replace the variables in the URL with specific values. We are accessing a sandbox environment so {{baseurl}} should be sandbox-quickbooks.api.intuit.com. This examples company ID is 193514574586539 so replace {{companyid}} with your company ID.
https://{{baseurl}}/v3/company/{{companyid}}/query?minorversion={{minorversion}}
is updated to
https://sandbox-quickbooks.api.intuit.com/v3/company/193514574586539/query?minorversion=8
If you are accessing a production QBO environment replace {{baseurl}} with quickbooks.api.intuit.com - After you have updated the URL (1) you can “Get New Access Token” (2)
- Here are the Get New Access Token values

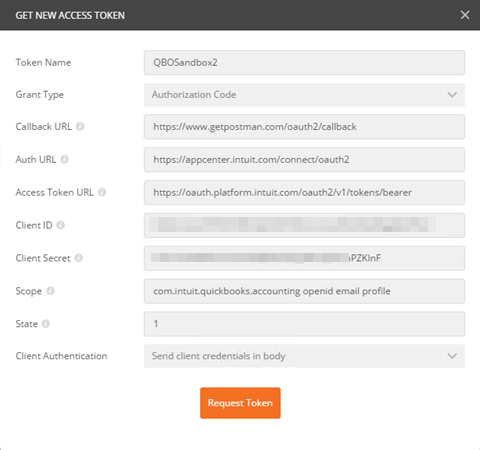
Callback URL
|
https://www.getpostman.com/oauth2/callback
|
Auth URL
| |
Access Token URL
| |
Client ID
|
[Your QuickBooks Online app Client ID]
|
Client Secret
|
[Your QuickBooks Online app Client Secret]
|
Scope
|
com.intuit.quickbooks.accounting openid email profile
|
State
|
1
|
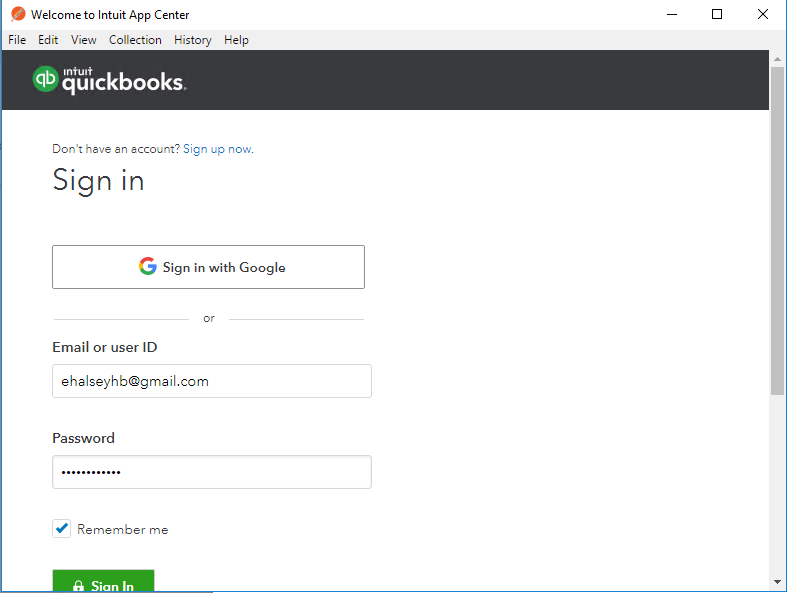
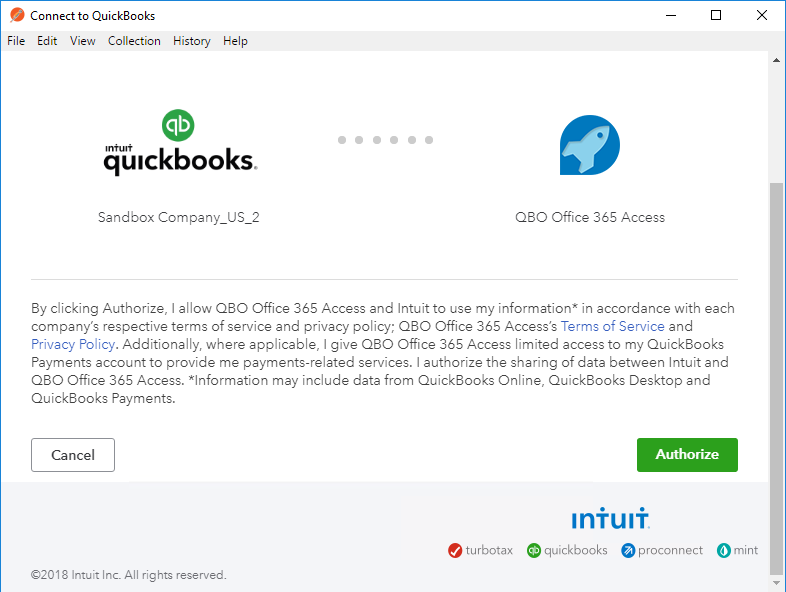
- Sign in and authorize your app to be used in Postman
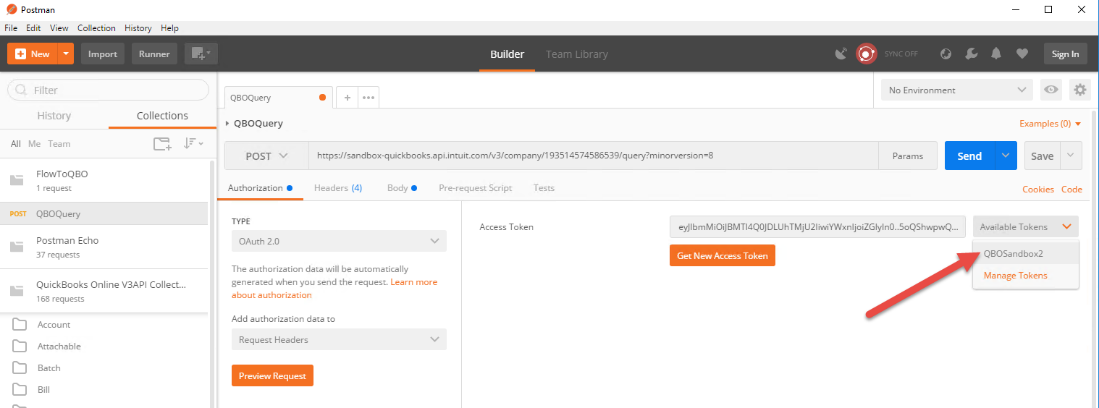
- Select the newly created Access Token
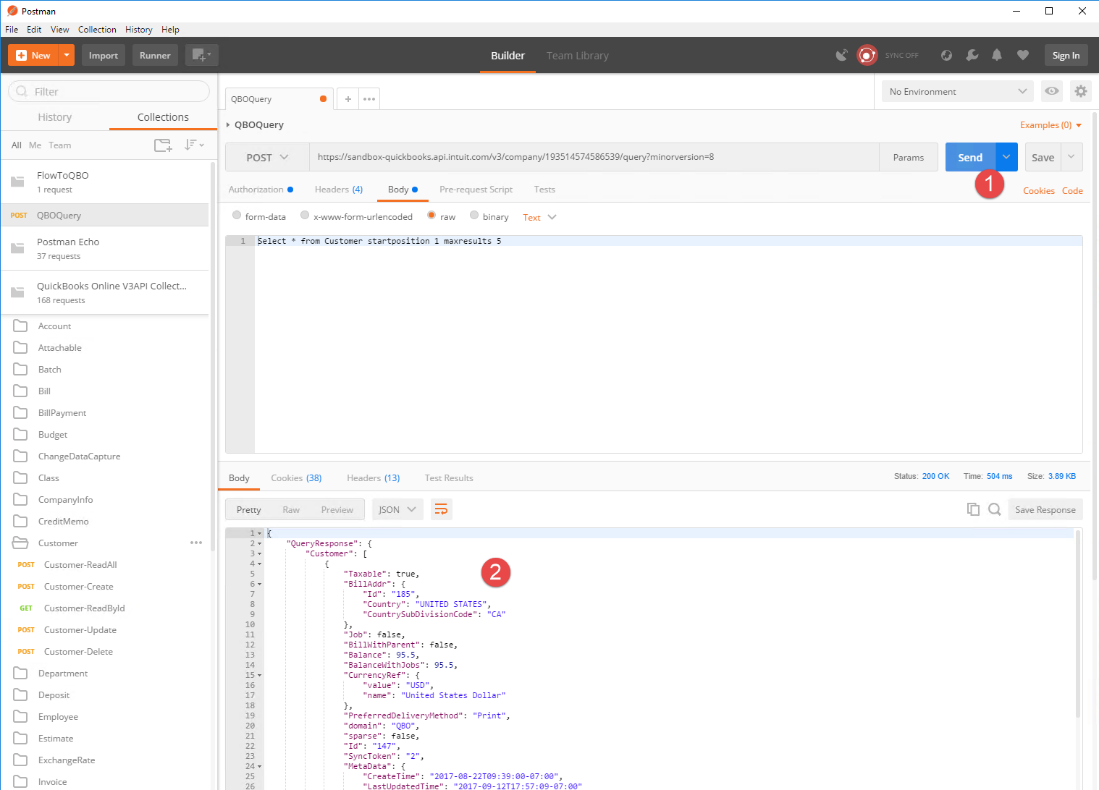
- Review the query
- Send (1) and review your results (2)
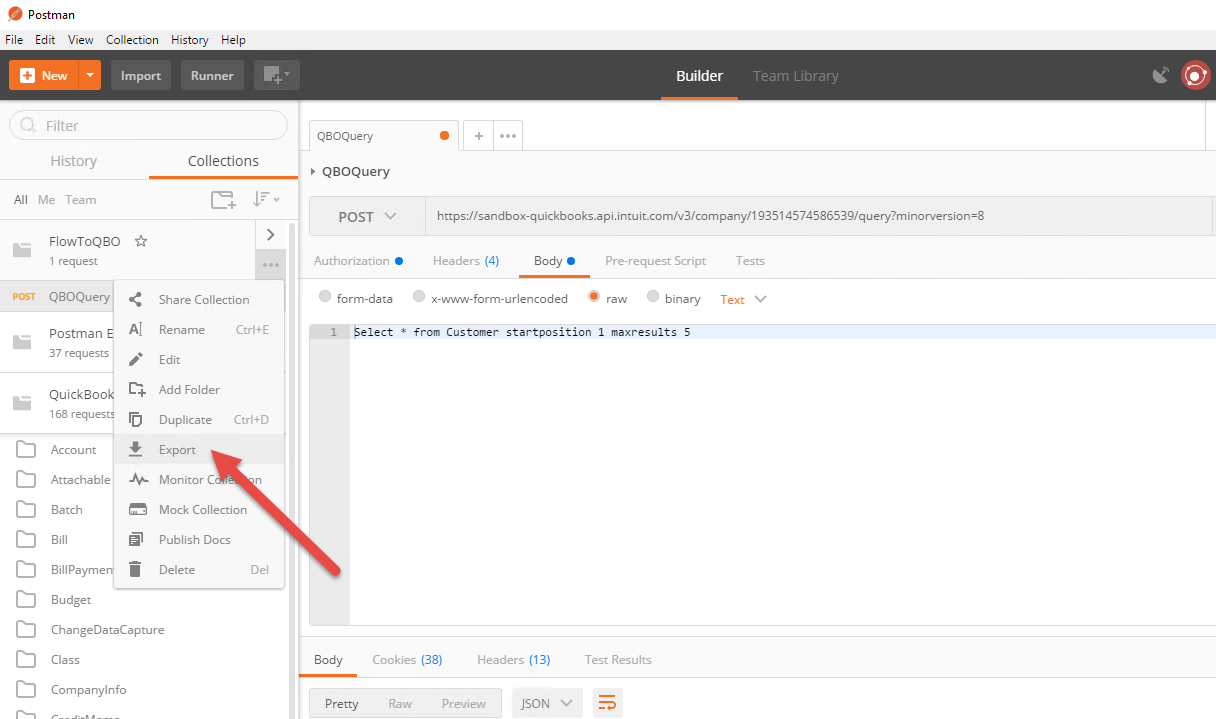
- Export the collection
- Make sure to select v1 as the collection type
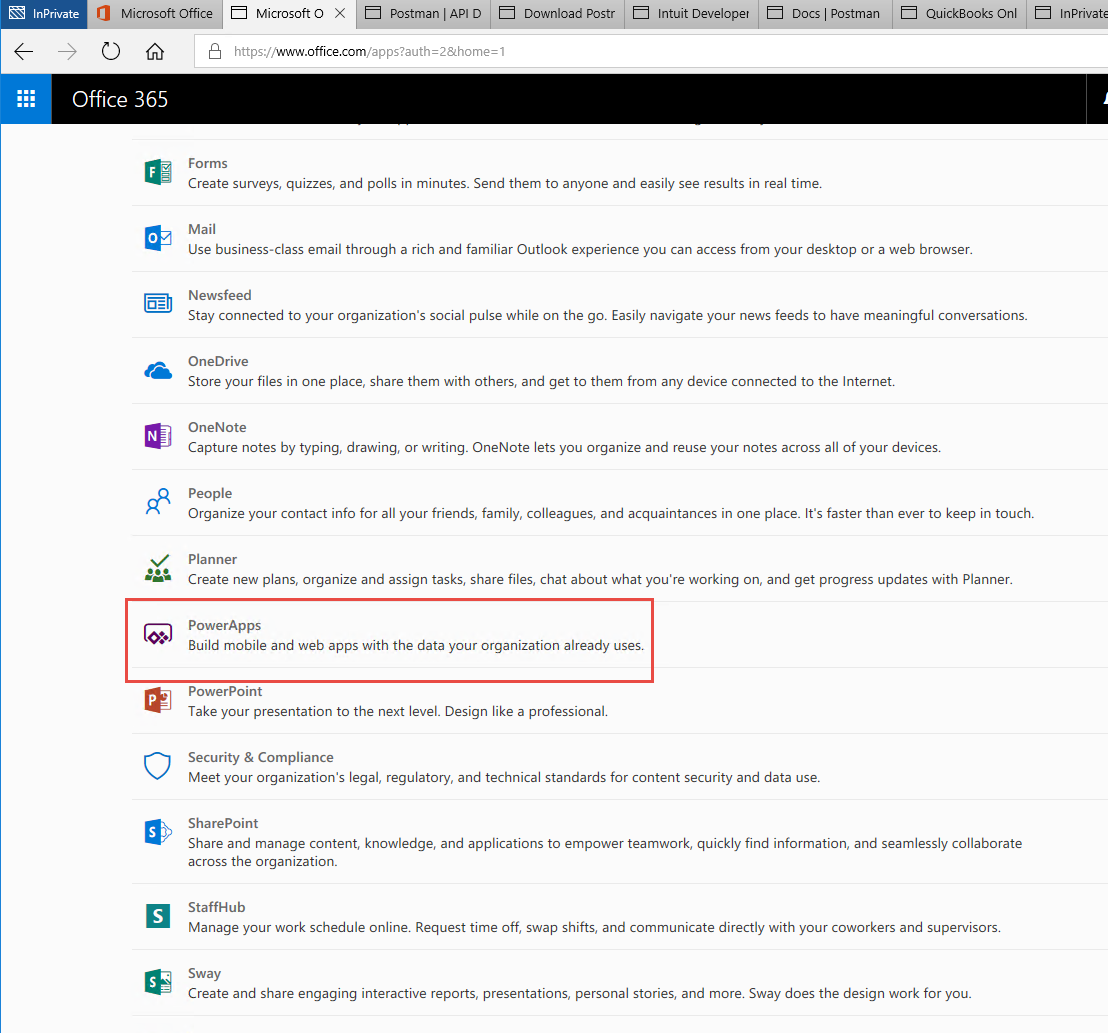
- Navigate to PowerApps in Office 365
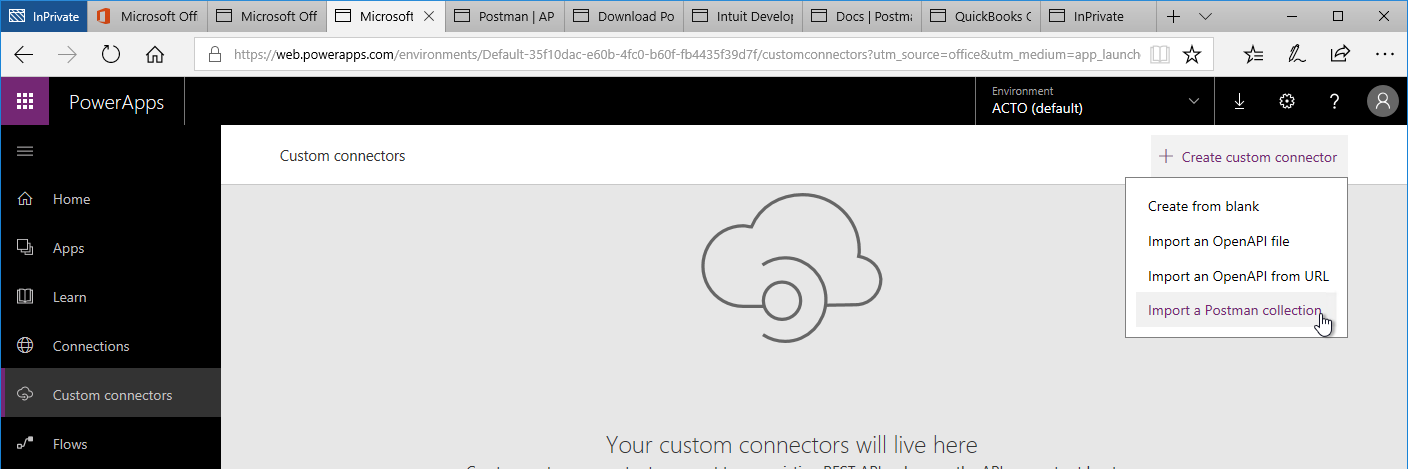
- Create a custom connection by importing a Postman collection you exported in 12
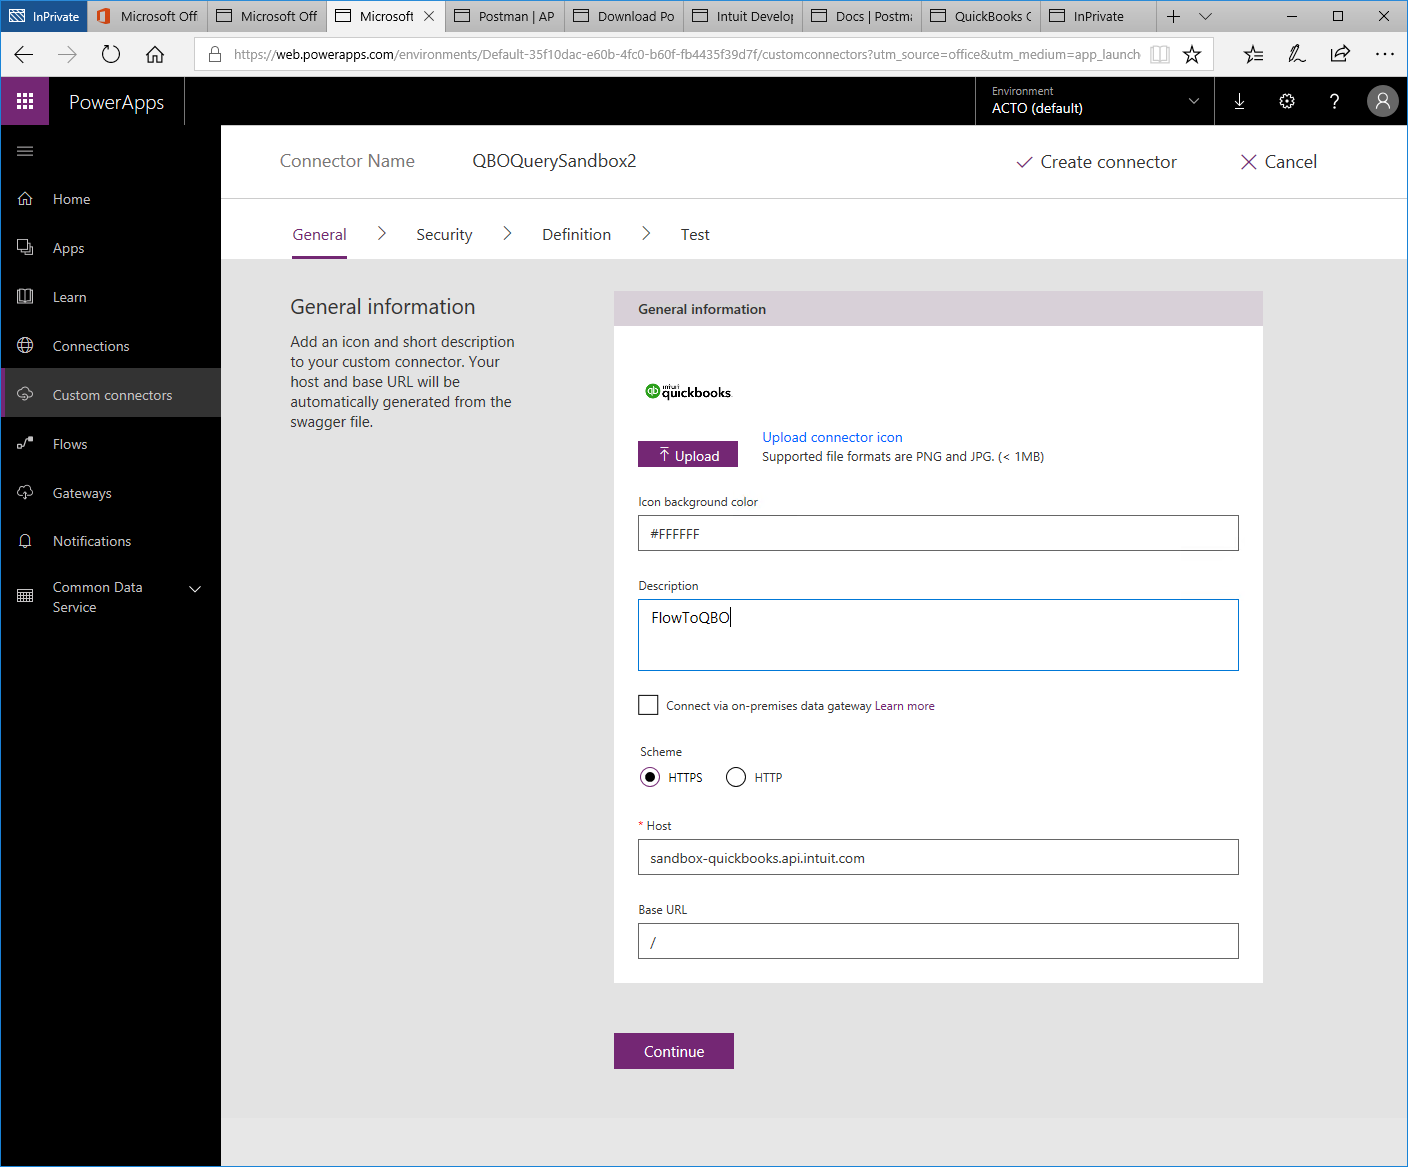
- Configure General settings
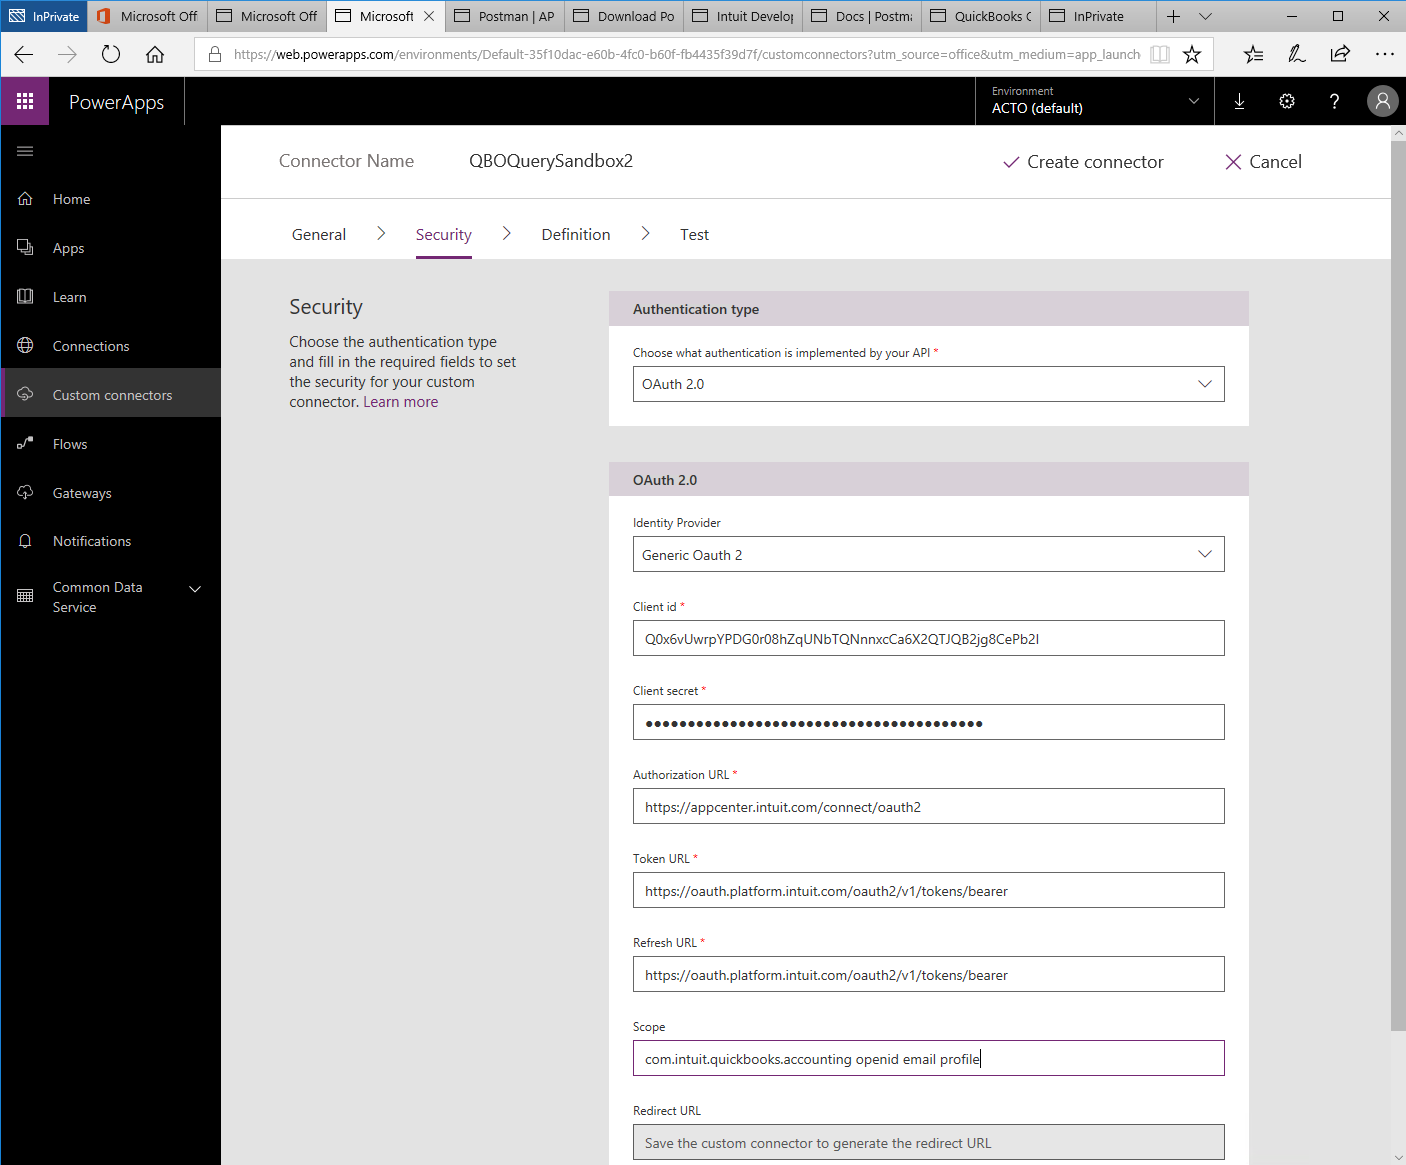
- Security Settings


Client ID
|
[Your QuickBooks Online app Client ID]
|
Client Secret
|
[Your QuickBooks Online app Client Secret]
|
Authorization URL
| |
Token URL
| |
Refresh URL (same as Token URL)
| |
Scope
|
com.intuit.quickbooks.accounting openid email profile
|
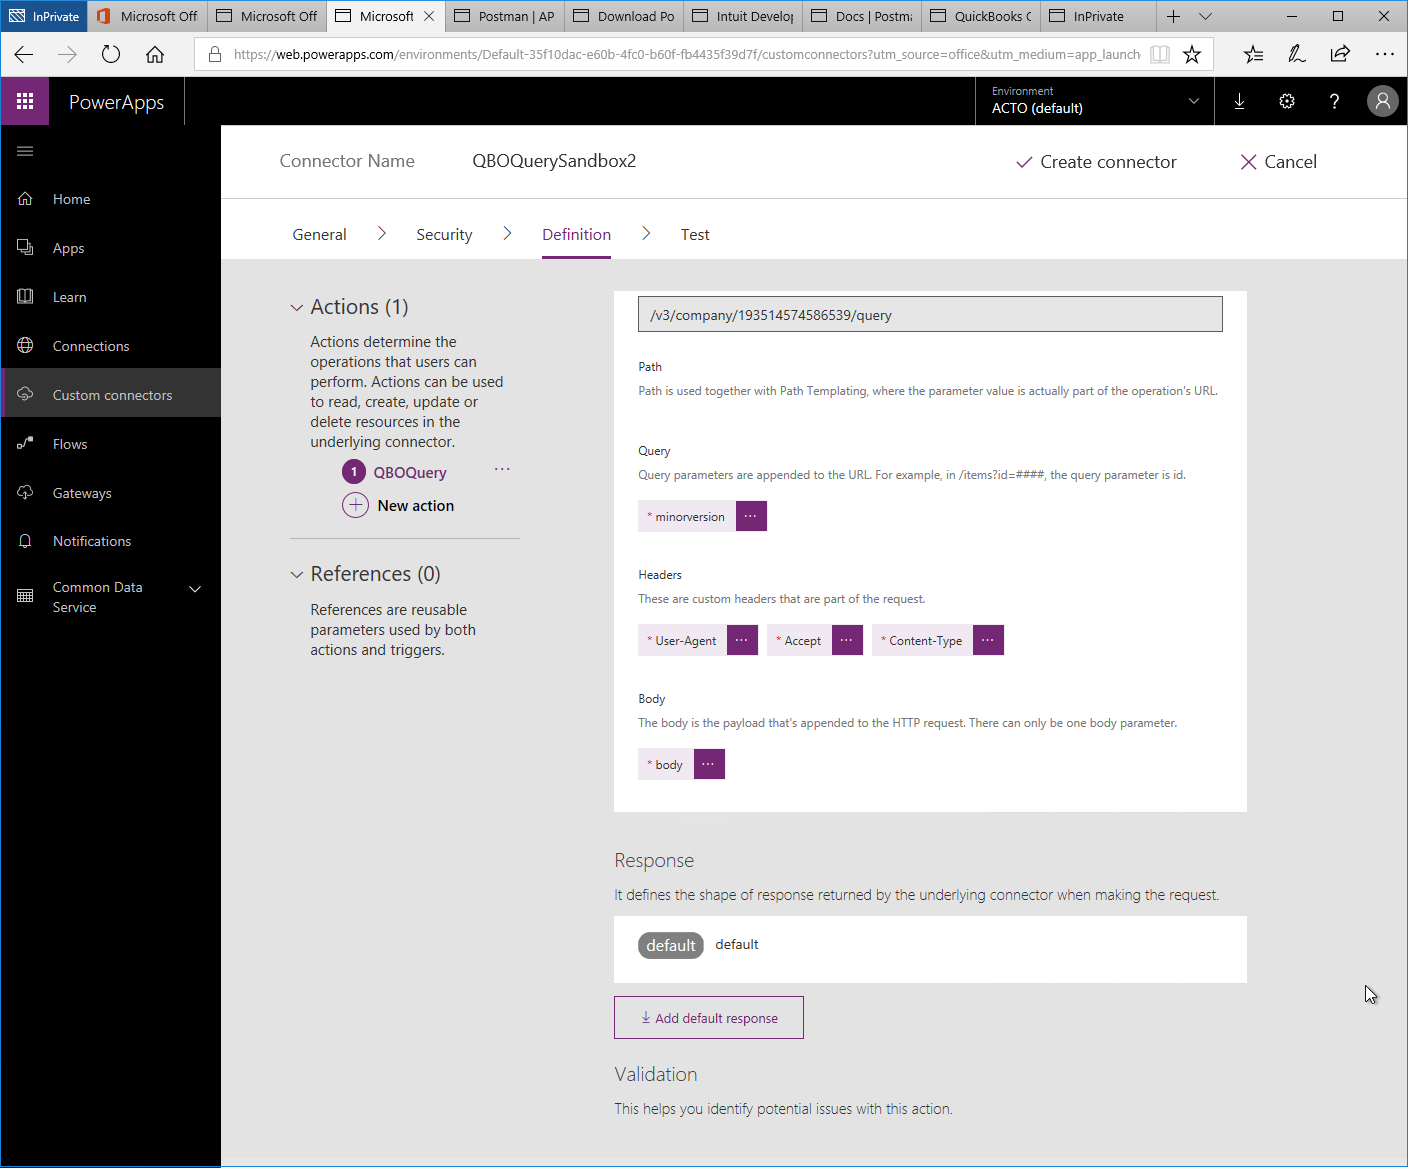
- Definition Settings
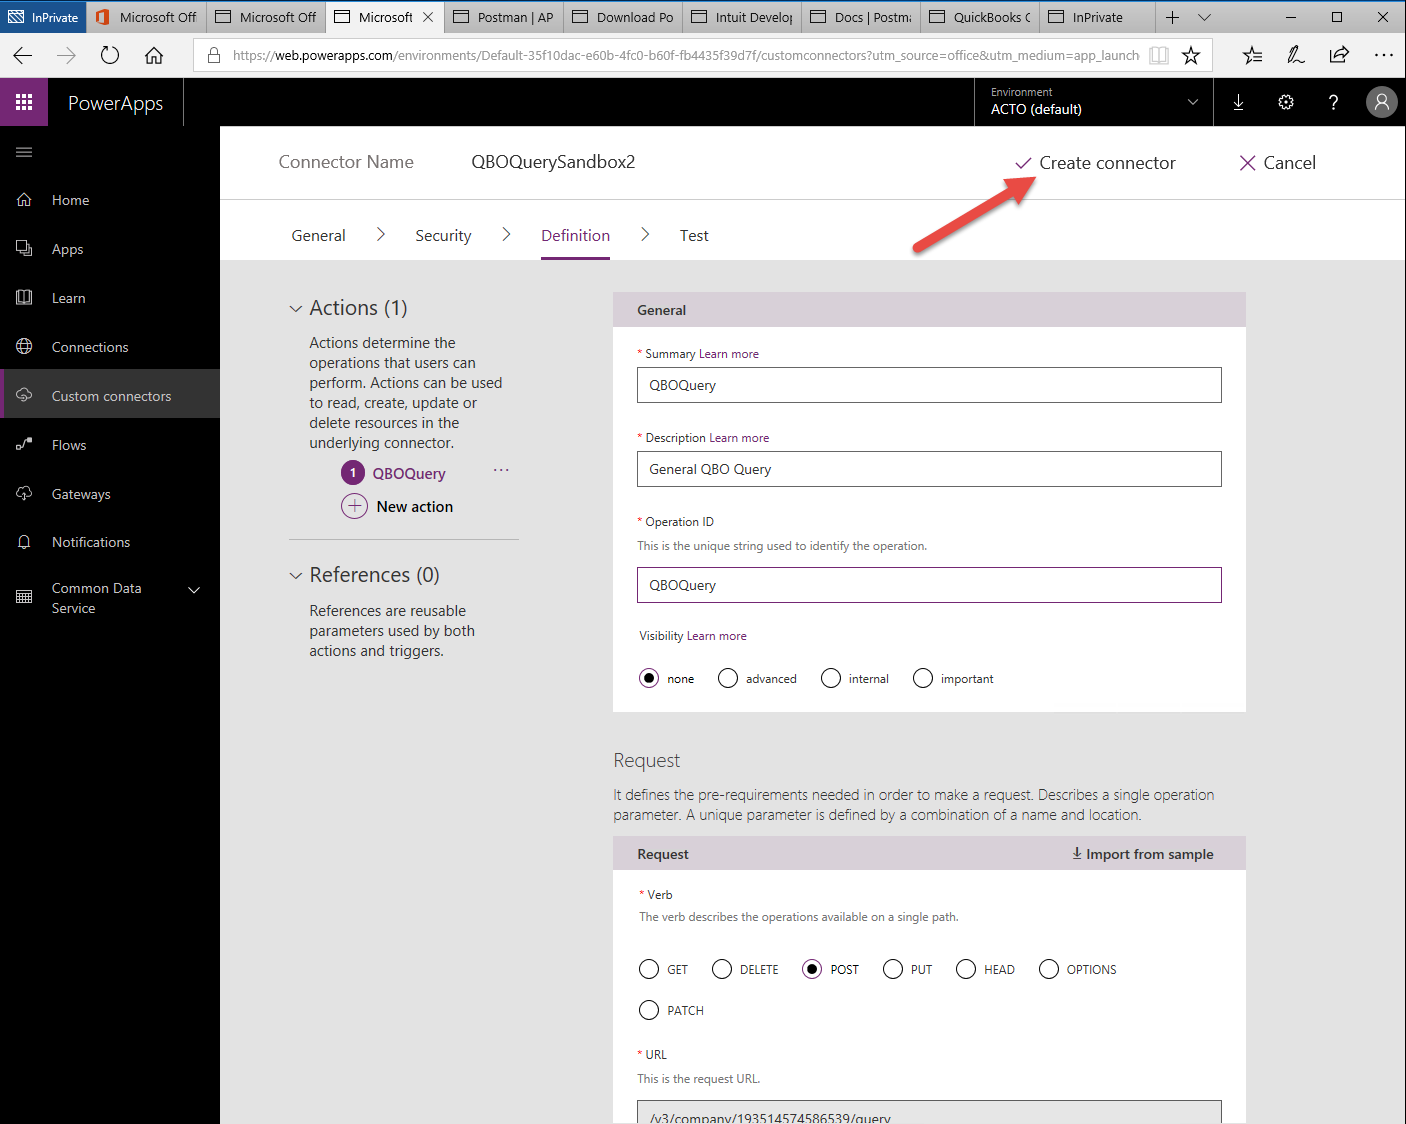
- Create connector
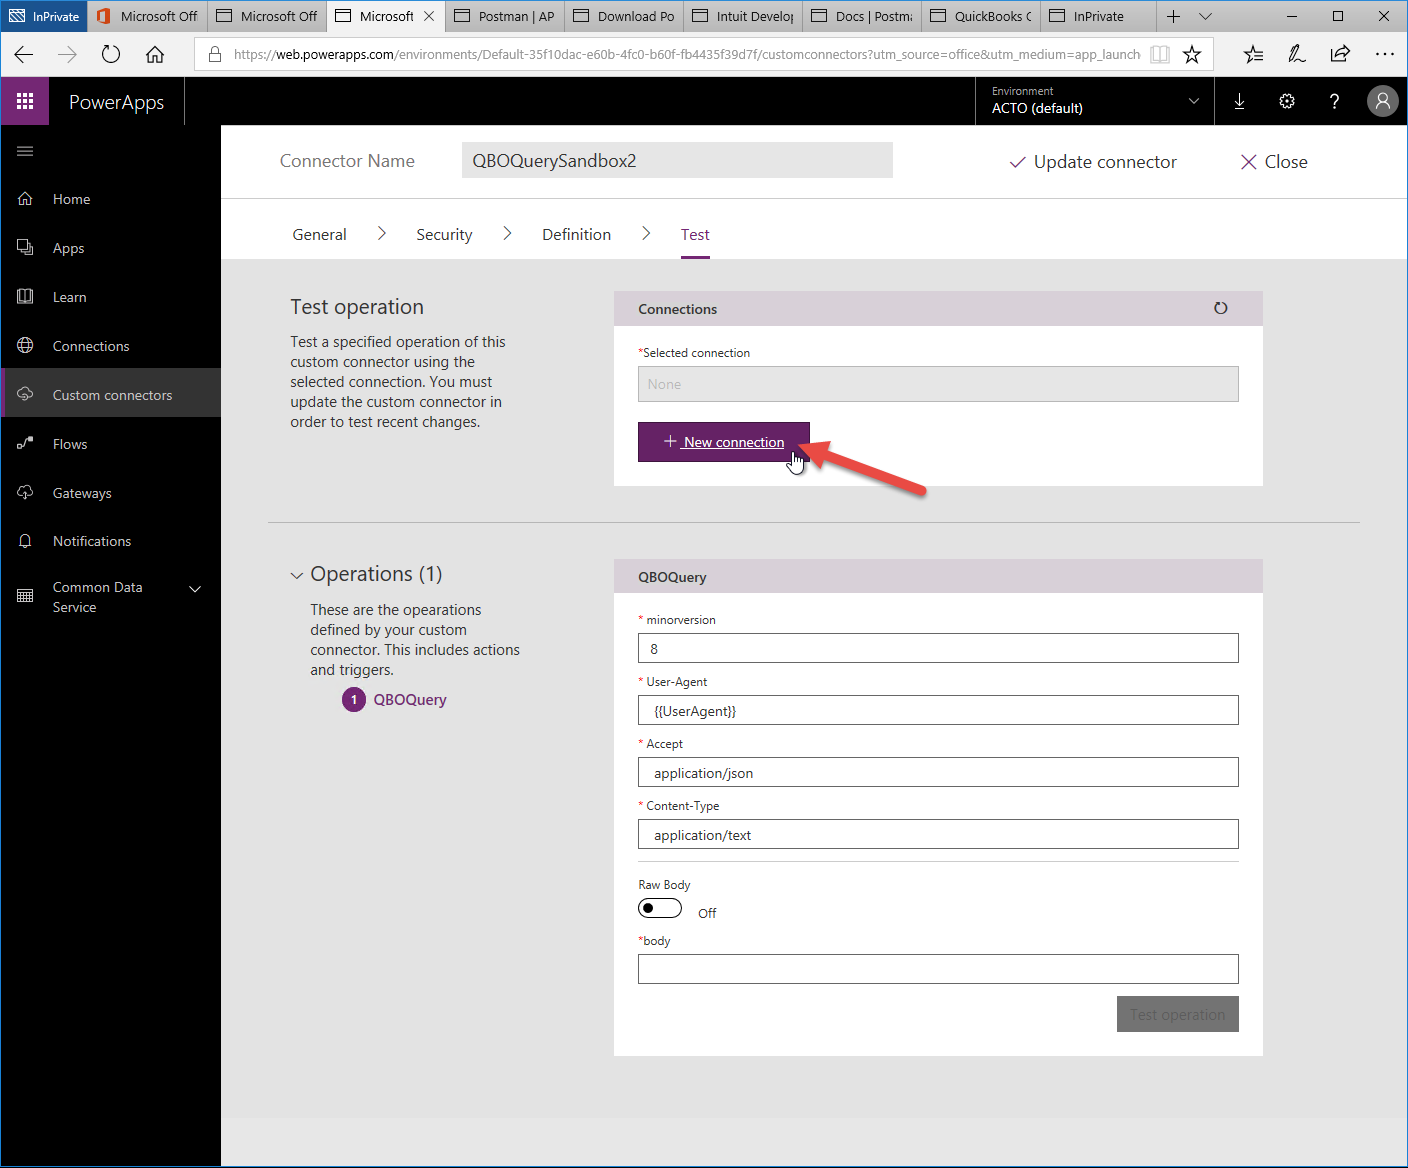
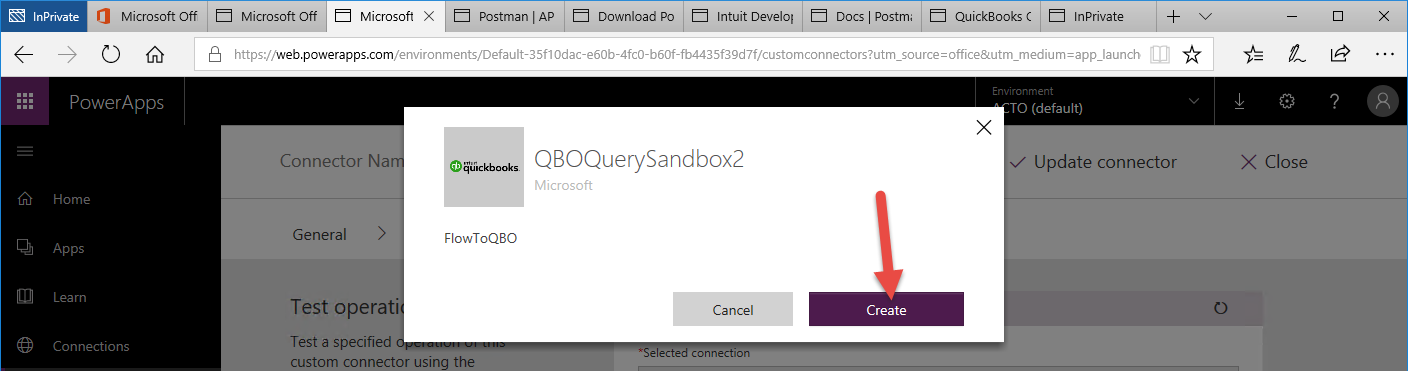
- Add the New connection
- Test your connection and API call
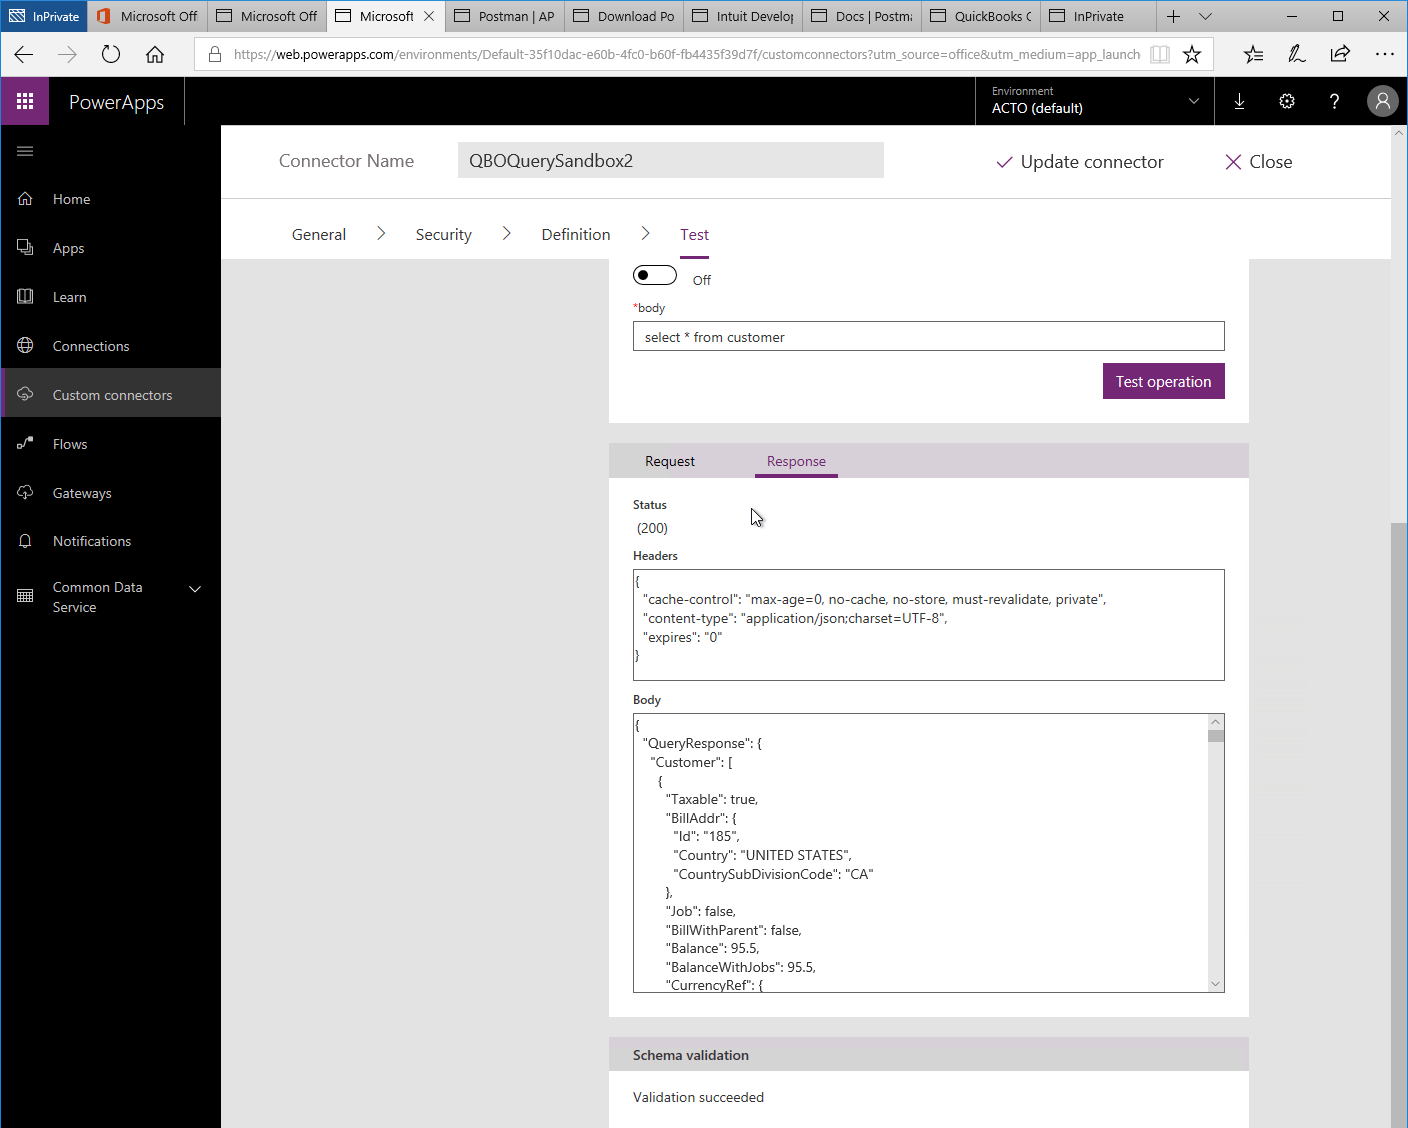
Enter a valid QBO query (1) e.g. select * from customer and Test operation (2)
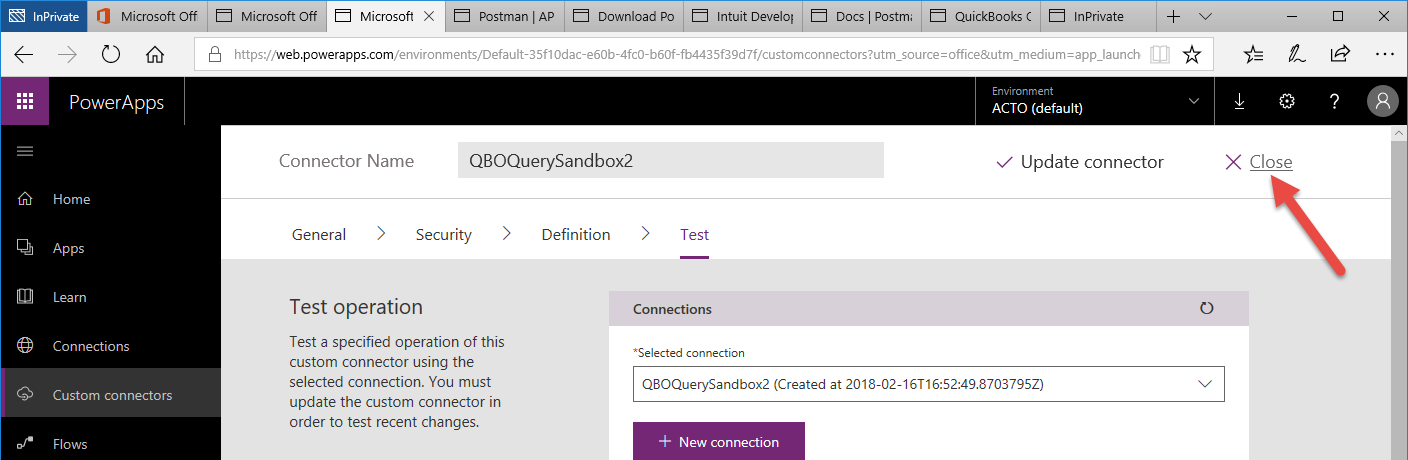
Confirm you received results in the Body and a 200 status was returned signifying success - Close the Connector
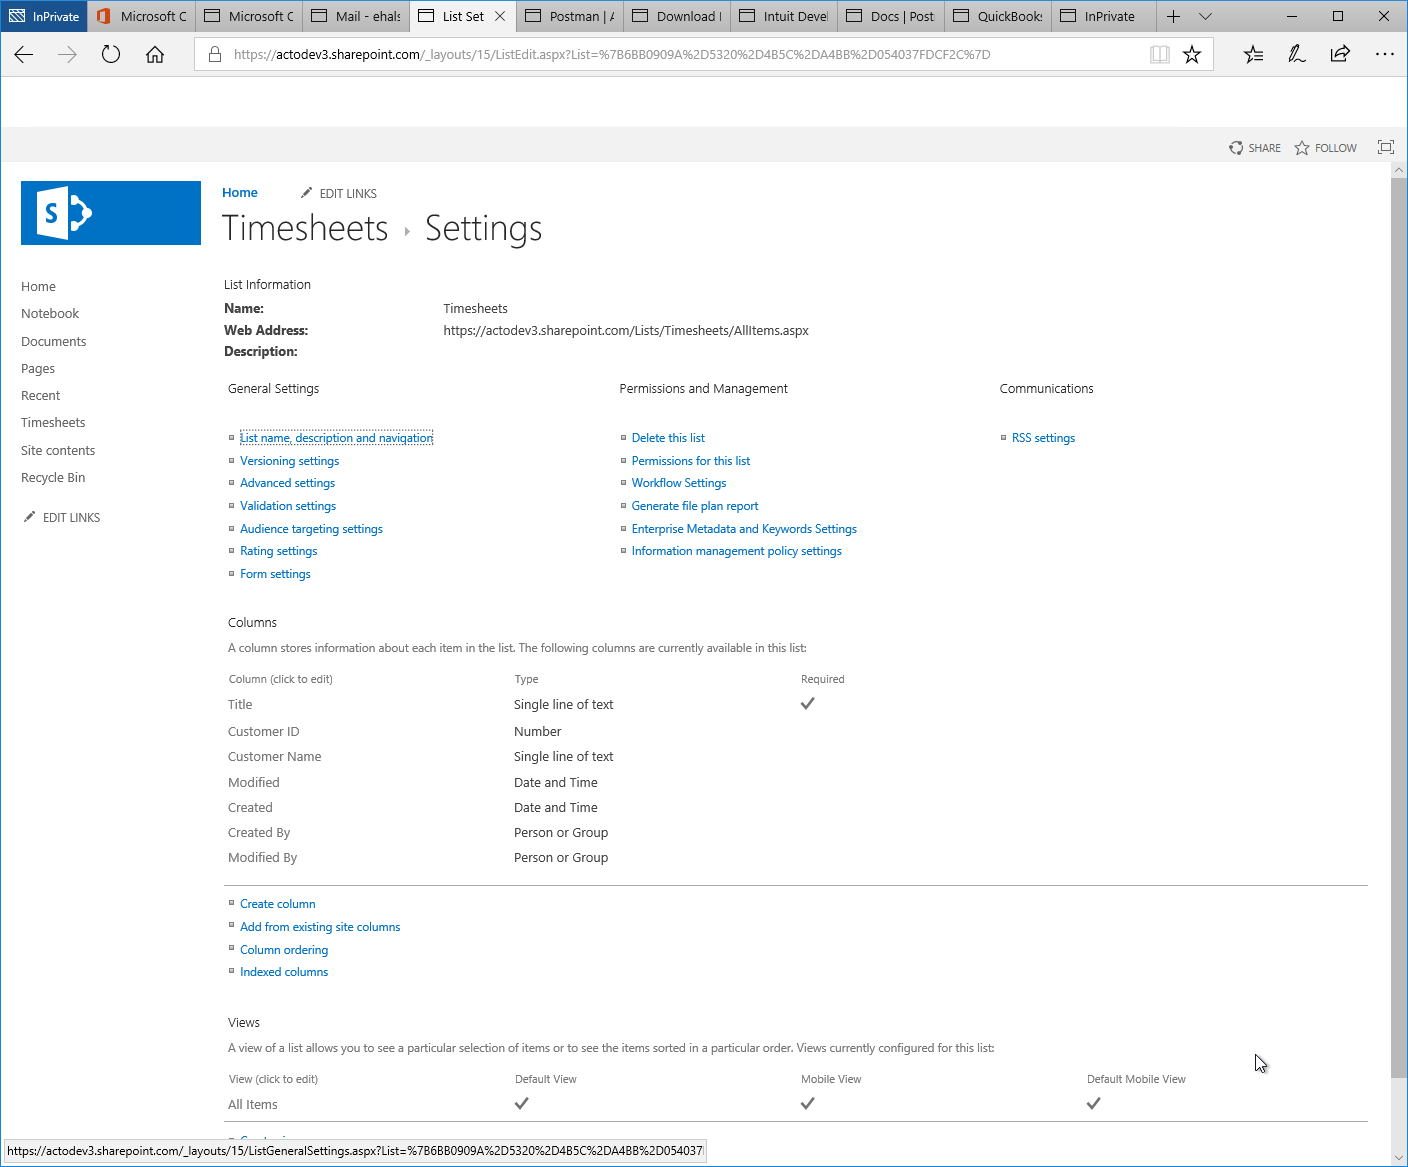
- Create the following SharePoint list
- Create the following Microsoft Flow
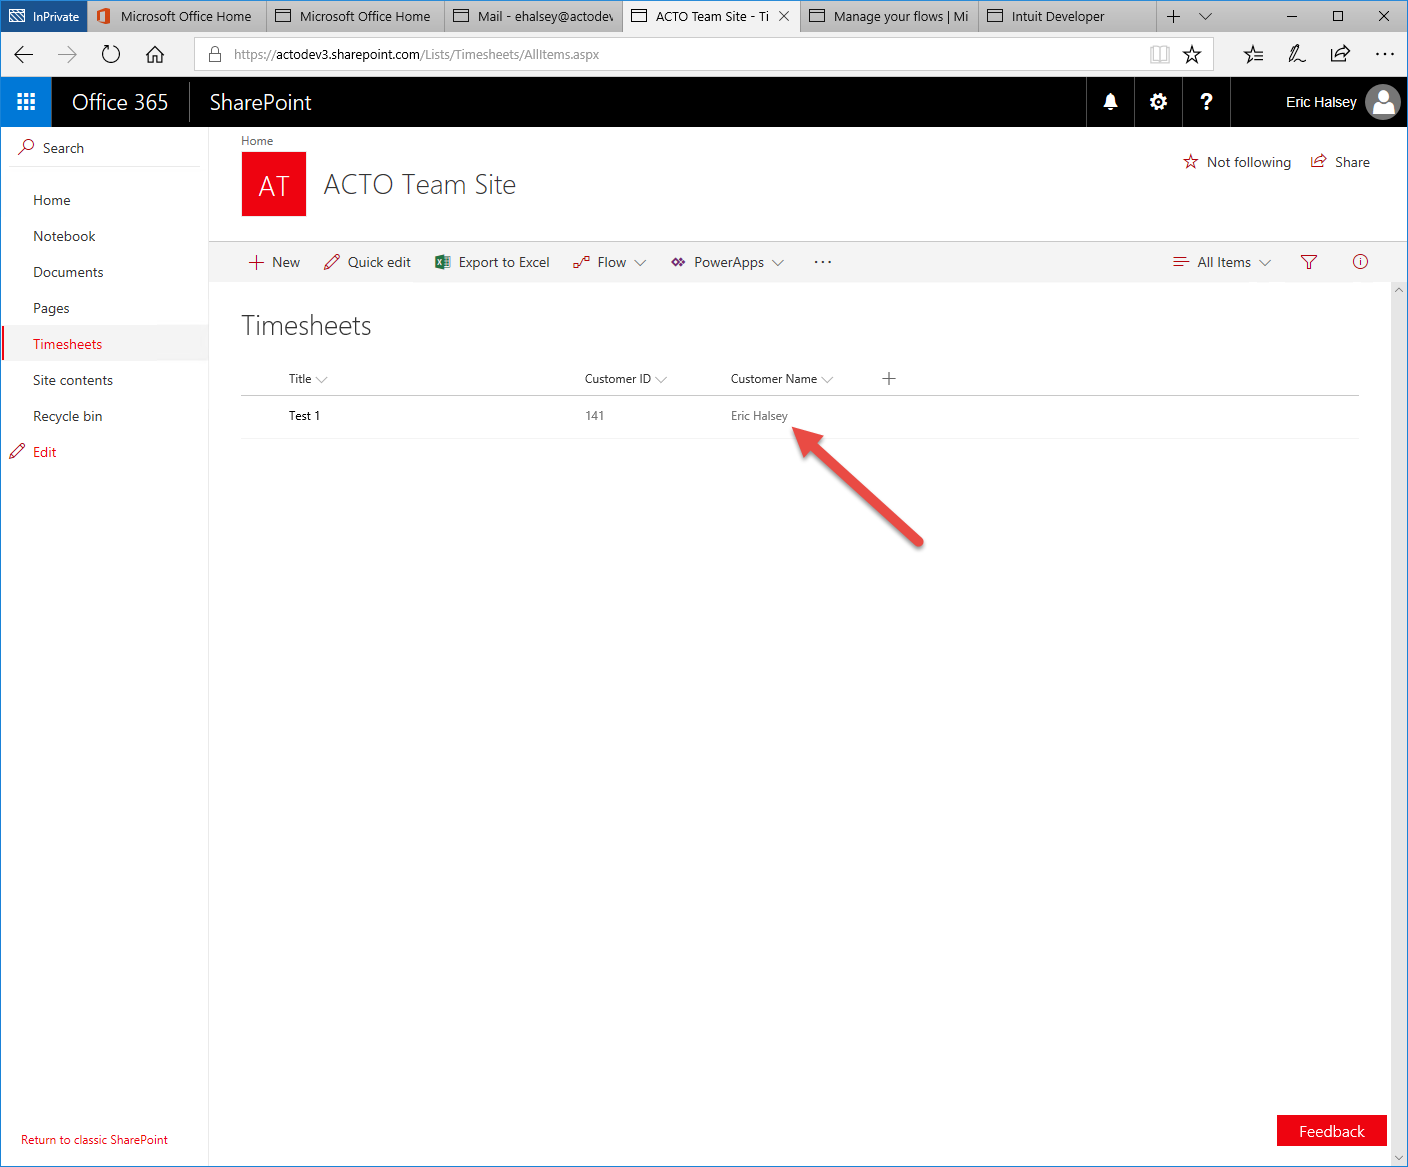
Customer Name expression should be set to body('QBOQuery')['QueryResponse']['Customer'][0]['DisplayName'] - Add a new item to your SharePoint list and confirm the Customer Name is populated


This comment has been removed by the author.
ReplyDeleteThis article was very helpful... but some steps are missing in this article which I have found on this article ... Both articles are great but this on have much more details on getting data from QuickBooks Online
ReplyDeletehttps://www.infobitsoft.com/2019/01/connect-to-quickbooks-online-using-microsoft-flow-powerapps-connector.html
Thank you very much for sharing this informative write-up. Quickbooks Integration
ReplyDeleteThank You, for such useful information.
ReplyDeleteYour posts are always easy to understand and Helpful.
Quickbooks Right Networks Integration
Quickbooks Paypal Integration
Quickbooks Stripe Integration
Quickbooks Integration Walmart
Cs Cart Quickbooks Integration
pinnacle Cart Quickbooks Integration
quickbooks salesforce integration
Quickbooks Online Integration With Etsy
This comment has been removed by the author.
ReplyDeleteI appreciate this walk through. It was simple enough to follow.
ReplyDeleteI implemented this and have been using flow to get customer data from QBO but seem to only be getting 100 customers even though we have many more than 100.
I use Select * From Customer
Any help would be great.
I found my own answer. I am a newbie at pretty much all programming but perhaps what I found might help someone like me.
DeleteThe QBO connector seems to only accept certain SQL statements. I have had success with:
SELECT * FROM Customer
This will return the data from all columns from the first 100 rows.
SELECT Company Name, DisplayName, FullyQualifiedName, ID, MetaData
FROM Customer
STARTPOSITION 1 MAX RESULT 1000
This returns the first 1000 rows with data from the listed columns (Company Name, DisplayName, FullyQualifiedName, ID, MetaData).
SELECT COUNT (*)
FROM Customer
This will give you the number of rows in the customers table.
Another note: Immediately after you use this connector in flow I have found it useful to run a Select Data Operations action. In the From dialog i put the following expression:
body('QBOQuerySandbox2')['QueryResponse']['Customer']
This connector does not include any Dynamic content so you will need to use expressions like item()?['Name'] or item()?['MetaData']?['LastUpdatedTime'] for each desired column.
Does this solution requires to get a new token each time before running the flow? I have no luck with this great step by by instruction and not sure where to turn to... :( I'm willing to pay to have someone help troubleshoot this process with me.
ReplyDeleteMy experience is that you should not need a new token each time. I have found that once the token is used in flow then it stops working in Postman. Sorry I can't be more help.
DeleteThis comment has been removed by the author.
ReplyDeleteVery useful content for quickbooks. quickbooks support phone number/ for quickbooks errors.
ReplyDeleteThanks for sharing, keep it up
ReplyDeleteHow to Resolve QuickBooks Error Code: C=147
Encountered Error C=147?
Well, it would have occurred due to:
• Damaged QuickBooks data file.
• Outdated version of the QuickBooks.
So, to fix this error:
You need to download the latest release for QuickBooks.
This can be done by going to the QuickBooks update option in the file menu of QuickBooks.
Restart your system, after updating.
And, you are good to go!! For more help, reach out to QBSsolved at +1(888) 910 1619.
Quickbooks helps all small and medium sized businesses in their accounting tasks and also helps in maintaining the company files and records etc. However at times, you may face an issue where is unable to verify Financial institution Error. And, this happens when Bank ID is not properly entered or if the program does not recognize the ID code. If you need to know more about this error, you can call Quickbooks enterprise support phone number at +1–888-485-0289.
ReplyDeleteDespite being an accounting software, QuickBooks may sometimes encounter several errors. QuickBooks update error code is one of them. QuickBooks Update errors usually appear while you try to download updates or during latest upgrades. Occurrence of such errors prevents QuickBooks from downloading updates. If you need to know more about this error, you can call Quickbooks Error support phone number at +1–888-485-0289.
ReplyDelete
ReplyDeleteThis is a nice informative post.
If you want to go to QuickBooks File Doctor download page directly and see how you can get it installed on your computer.
To resolve Quickbooks unable to verify financial institution error:
ReplyDeleteMethod 1: Open QB file with Excel.
You need to browse to the 20th line 2002 after opening the file in MS Excel.
Then get the last four digits to 3000.
Save these changes and get the file uploaded to Quickbooks.
Method 2:
Open the fidir.txt file and run it in the notepad.
Then, you have to browse for C:\Program Data\20XX\filist and also the bank’s name MB financial/
Make sure to note down the 4 sets of numbers - “1-888-910-1619”.
Locate , or through the notepad.
Also ensure to change the numbers which are near the characters with the number associated with FIDIR.
Open the company file and then import it.
1-888-910-1619
Thanks for sharing informative information, get quick response, connect with Quickbooks Enterprises support at +1(855)-738-0359, our team of experts will help you get rid of QuickBooks Error Missing Name List Problem and others QuickBooks software issues. Call now!
ReplyDeleteDo you know how to choose the right size mountain bike? Continue reading and we'll walk you through the steps. Mountain bike sizing differs significantly from road bike sizing and other types of bikes for riders with different cycling backgrounds. Check out our article if you want to learn more about today's mountain bike market and what to look for when buying one 17 inch mountain bike frame from here.
ReplyDeleteI don't understand why QuickBooks doesn't publish their official Power Automate Connectors like other software vendors. That would save a lot of trouble...
ReplyDelete